

Estimated reading time: 6 minutes
Originally published March 15, 2023.
Showit Website Migration Checklist
A Showit website migration that preserves rankings requires more than moving files from one platform to another. Every URL, page title, internal link, and image carries search value that either transfers to your new site or disappears depending on how the migration is executed. This step by step SEO checklist comes from migrating over 100 websites to Showit.

This guide covers the full process from domain setup through sitemap submission, whether you are migrating from WordPress, Squarespace, ProPhoto, Wix, or another Showit site.
This post assumes you have already set up your Showit account and completed your site design.
In This Guide
- Free Showit Site Migration Checklist
- Table of Contents
- Keep Your Domain Name
- Create a List of New Pages
- Create a List of Existing Pages
- Maintain URL Structure
- Maintain Page Slugs
- Maintain Page Titles and Meta Descriptions
- Maintain Internal Linking
- Connect the Blog
- Upload General Share Image
- Set the Favicon
- Prepare Images for SEO
- Check Site Canvases for SEO
- Check Header Tags
- Check Title Tags and Meta Descriptions
- Install SSL on Your Showit Website
- Establish 301 Redirects
- Install and Verify GA4 Tracking
- Check Your Showit Sitemaps
- Submit Your Sitemap to Google Search Console
- Frequently Asked Questions About Showit Website Migration
- What to Do After Your Showit Migration
- Next Steps
Free Showit Site Migration Checklist
Work through each step with the downloadable Showit Site Migration Checklist and Worksheet.
Table of Contents
- Keep Your Domain Name
- Create a List of New Pages
- Create a List of Existing Pages
- Maintain URL Structure
- Maintain Page Slugs
- Maintain Page Titles and Meta Descriptions
- Maintain Internal Linking
- Connect the Blog
- Upload General Share Image
- Set the Favicon
- Prepare Images for SEO
- Check Site Canvases for SEO
- Check Header Tags
- Check Title Tags and Meta Descriptions
- Install SSL on Your Showit Website
- Establish 301 Redirects
- Install and Verify GA4 Tracking
- Check Your Showit Sitemaps
- Submit Your Sitemap to Google Search Console
Keep Your Domain Name
Your domain accumulates backlinks, brand recognition, and search history over time. Changing it resets that history with Google.
Keep your domain the same. When you move to a new domain, Google treats your site as a new property. Rankings you built on the old domain do not transfer automatically.
If you must change your domain, set up 301 redirects from every page on the old domain to the corresponding page on the new one. This tells Google the content has moved permanently. Without 301 redirects, backlinks pointing to your old domain lead to 404 pages, and the ranking value those links carried is lost.
Create a List of New Pages
Before you launch your new Showit site, document every new page URL you plan to publish. This list serves two purposes. First, it gives you a reference for building your navigation and internal links. Second, it creates the foundation for your redirect map.

Write down the full URL for each page, including the slug. If you plan to add pages that did not exist on your old site, note those separately so you can exclude them from the redirect mapping step later.
Create a List of Existing Pages
Your Showit site may not include all pages in its sitemap automatically. Document every indexed page from Google Search Console and any additional pages that exist on your current site, including blog category pages.
How to Export Indexed Pages from Google Search Console
Open the Performance report in Google Search Console. Use the export function to download a list of all pages Google has indexed. This report shows which URLs currently appear in search results and which do not.
How to Document All Existing Pages
Use Screaming Frog SEO Spider to crawl your current site. Screaming Frog records every URL it finds, along with status codes, response times, and link data. The output gives you a complete picture of your site architecture before migration begins.
Screaming Frog also identifies pages that Google Search Console may not report, including orphaned pages, pages blocked by robots.txt, and pages returning error codes.
Maintain URL Structure
URL structure changes affect how Google indexes your site. Done well, they improve rankings. Done poorly, they erase months of search visibility.
Moving from parameter-based URLs to descriptive URLs can result in improved rankings. Google reads descriptive URLs as signals about what the page covers. Changing URLs requires careful planning. Every URL change needs a corresponding 301 redirect. Miss one, and that page loses its search history.
URLs need to be structured for three audiences, in this order:
- New visitors who need to understand where they are on the site
- Returning customers who expect familiar navigation
- Search engine crawlers that use URL paths to understand site hierarchy
Maintain Page Slugs
A slug is the part of the URL that describes the page content. The About page uses /about. The contact page uses /contact. These slugs tell both visitors and search engines what to expect on the page.
During your Showit migration, keep page slugs the same wherever possible. Changing a slug changes the URL. Google must then re-index that page. If you do need to change a slug, set up a 301 redirect from the old URL to the new one.
There is one exception. If your old site had a confusing navigation structure with unclear slugs, the migration is the right time to correct that. Google’s ranking algorithm rewards sites that are easy for users to navigate. A clearer URL structure can offset the short-term cost of the redirect.
Maintain Page Titles and Meta Descriptions
Page titles and meta descriptions are among the first things Google reads when it crawls a page. They also appear directly in search results. Changing them during a migration can cause a temporary dip in click-through rates while Google re-evaluates your listings.
Keep your page titles and meta descriptions identical during the initial migration. You can revise them later, after Google has re-indexed your new site and confirmed that your rankings are stable.
In Showit, page titles and meta descriptions are found under the SEO Settings tab for each page. Verify that every page on your new Showit site matches the title and description from your old site before you go live.
Maintain Internal Linking
Internal links define your site architecture. They tell Google which pages are most important and how topics on your site relate to each other. When you migrate to Showit, internal links can break in ways you do not expect.
Site structure directly affects search engine ranking. If an important page requires four or more clicks from the homepage to reach, Google treats it as low priority. That page will not rank well and will not drive traffic.
Before you migrate, map your current internal link structure. Identify which pages are buried deep in the site hierarchy and plan to bring them closer to the homepage in your new Showit design.
Screaming Frog SEO Spider generates a Site Structure report that shows every URL on your site and how many clicks it takes to reach each one from the homepage. Use this report to find pages that need to move higher in your navigation.
How Does Internal Linking Work Differently in Showit?
Internal linking in Showit works differently than in a standard WordPress site because Showit pages and WordPress blog posts exist on separate systems. Links between your Showit pages and your WordPress blog require separate attention during migration. Verify that every internal link on both your Showit pages and your WordPress posts resolves to a live URL after launch.
Connect the Blog
Showit uses WordPress for its blogging platform. Your blog lives on a WordPress installation connected to your Showit site. If you have an established blog on your current website, you need to migrate that content and connect the blog during the Showit migration process.
Here are the steps for connecting your blog in Showit:
- Inside Showit, click on Site Settings and select Edit next to Custom Domain.
- Click the button to get started and enter your domain name.
- Check the boxes for the settings that apply to your setup. Make sure you check the box for “I currently have a blog at this domain.”
- Double-check your details, then provide your phone number and any additional information. You can choose to set up your blog now or wait until later.
- When you click “Yes, proceed to blog setup,” select the blog setup type that matches your needs. The next screen confirms the domain where your blog will be available.
- Tell Showit support the domain where your blog currently lives and fill out the blog request form with your current registrar information.
When you submit your request, you can choose to go live immediately or wait until you contact the Showit team to confirm you are ready to launch. Review your blog migration details, add any final notes, and click Submit.
Upload General Share Image
The share image is the default image that appears when someone shares a link to your website on Facebook, LinkedIn, or any other social platform. Without a share image, the platform pulls whatever image it finds first, which may be a logo, a random photo, or nothing at all.
In Showit, set the default share image on your home page under the SEO Settings tab. Use an image that is at least 1200 x 630 pixels, includes your brand name, and represents your business clearly. This image appears every time someone shares a page that does not have its own dedicated share image assigned.
Set the Favicon
A favicon is the small icon that appears in browser tabs, bookmarks, and search results next to your site name. It is a visual marker that helps visitors identify your site.
Prepare a Favicon File
Save your favicon as a PNG file, sized 32px by 32px. Tools such as faviconr.com or favicon.pro can generate this file from a larger image.
Add the Favicon to Your Showit Site
- Open your site design in Showit. In the site panel on the left, go to the Site tab, then Site Settings.
- Find the Favicon setting and click Choose Image.
- Upload your favicon file and select it.
- A preview shows how the favicon will appear in the browser tab.
- Publish your site to apply the change.
The favicon may not appear in all browsers immediately. Browsers that have already cached your site can take up to 24 hours to display the updated icon.
Prepare Images for SEO
Image file size directly affects how fast your Showit site loads. A blog post with 100 images at 2 MB each forces a visitor on a standard mobile connection to wait more than six seconds just for the images to load, before any other page content appears.
Every image on your Showit site needs three things: a compressed file size, a descriptive file name, and complete alt text. The file name tells Google what the image depicts. The alt text tells screen readers and search engines the same thing in sentence form.
For a detailed walkthrough, read the Photographer’s Guide to Showit Image SEO. That guide covers file naming conventions, compression tools, alt text writing, and Showit-specific image settings.
Check Site Canvases for SEO
Showit uses canvases to build page sections, including headers, footers, and reusable content blocks. Each canvas can contain text, images, and links that affect your search performance.
Review every site canvas for correct heading hierarchy, descriptive link text, and properly attributed images. For a full walkthrough, read How to Set Up Showit Site Canvas Views for SEO.
Check Header Tags
Every page on your Showit site should have exactly one H1 heading tag. The H1 tells Google the primary topic of that page. Multiple H1 tags on a single page confuse the hierarchy and dilute the signal.
Review each page in your Showit site editor and confirm the heading tag assignments. Your H1 should contain the primary keyword for that page. All other headings should use H2 through H6 in logical order.
For a full walkthrough of heading tags in Showit, read How to Use Showit Header Tags for SEO.
Check Title Tags and Meta Descriptions
Use Showit’s built-in SEO tools to verify that every page has a unique title tag and meta description. The title tag appears in the browser tab and in Google search results. The meta description appears below the title in search results and influences whether a searcher clicks through to your site.
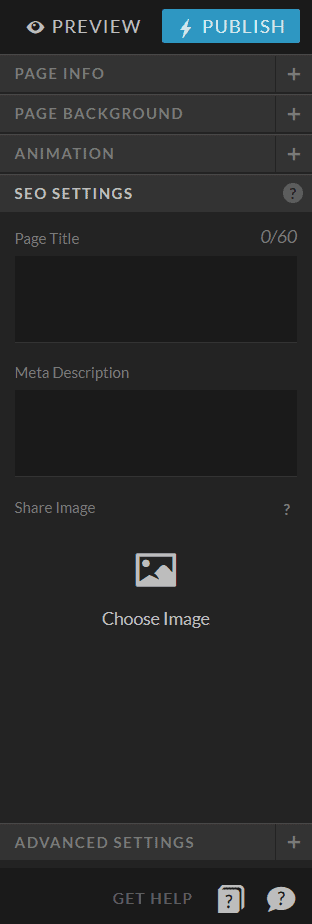
Each title tag should be under 60 characters and include the primary keyword for that page. Each meta description should be under 155 characters and describe what the visitor will find on the page.
Install SSL on Your Showit Website
SSL (Secure Sockets Layer) encrypts the data transmitted between your website and its visitors. When SSL is installed, your site URL begins with https:// instead of http://. Google has used HTTPS as a confirmed ranking factor since 2014.
Does Showit Include SSL?
Yes. Showit includes free SSL certificates with all subscription levels. The installation process takes up to 24 hours. Showit moves your site to a new server to enable SSL and updates your DNS records as part of the process.
How to Request SSL on Your Showit Website
- Open Showit and click the chat icon in the bottom right corner.
- Send a message requesting SSL. The process typically completes within 24 hours, and often within an hour.
How to Verify SSL Is Active
If your website URL begins with https://, SSL is active. Most browsers also display a lock icon next to the URL in the address bar.
If you see a “Not Secure” warning or a privacy error after requesting SSL, consult the Showit SSL troubleshooting guide for steps to resolve common issues.
What Happens Without SSL?
Google Chrome displays a “Not Secure” warning on any page that collects user input through a form and does not use HTTPS. If your site has a contact form or email signup form without SSL, visitors see that warning before they submit any information. This affects trust and can reduce form submissions.
Establish 301 Redirects
A 301 redirect tells search engines that a page has permanently moved to a new URL. Every URL that changes during your Showit migration needs a 301 redirect from the old address to the new one.
Without 301 redirects, backlinks to your old pages lead to 404 error pages. The ranking authority those backlinks carried is lost. Visitors who bookmarked your old pages or find them in search results land on a dead page instead of your content.
There are two types of redirects:
Permanent redirects (301) tell search engines the move is permanent. Google transfers ranking signals from the old URL to the new one. Use 301 redirects for every URL that changed during your migration.
Temporary redirects (302) tell search engines the move is temporary and the old URL may return. Do not use 302 redirects during a site migration. They prevent Google from transferring ranking authority.
RankMath, a WordPress SEO plugin, includes a redirect manager that works well with Showit sites. You can add redirects individually or import a list in bulk.
The free Showit Site Migration Checklist includes a video walkthrough of setting up redirects step by step.
Download the Free Showit Site Migration Checklist
Install and Verify GA4 Tracking
Google Analytics 4 (GA4) is a free tool from Google that tracks visitor behavior on your website. It records how visitors find your site, which pages they view, how long they stay, and where they leave.
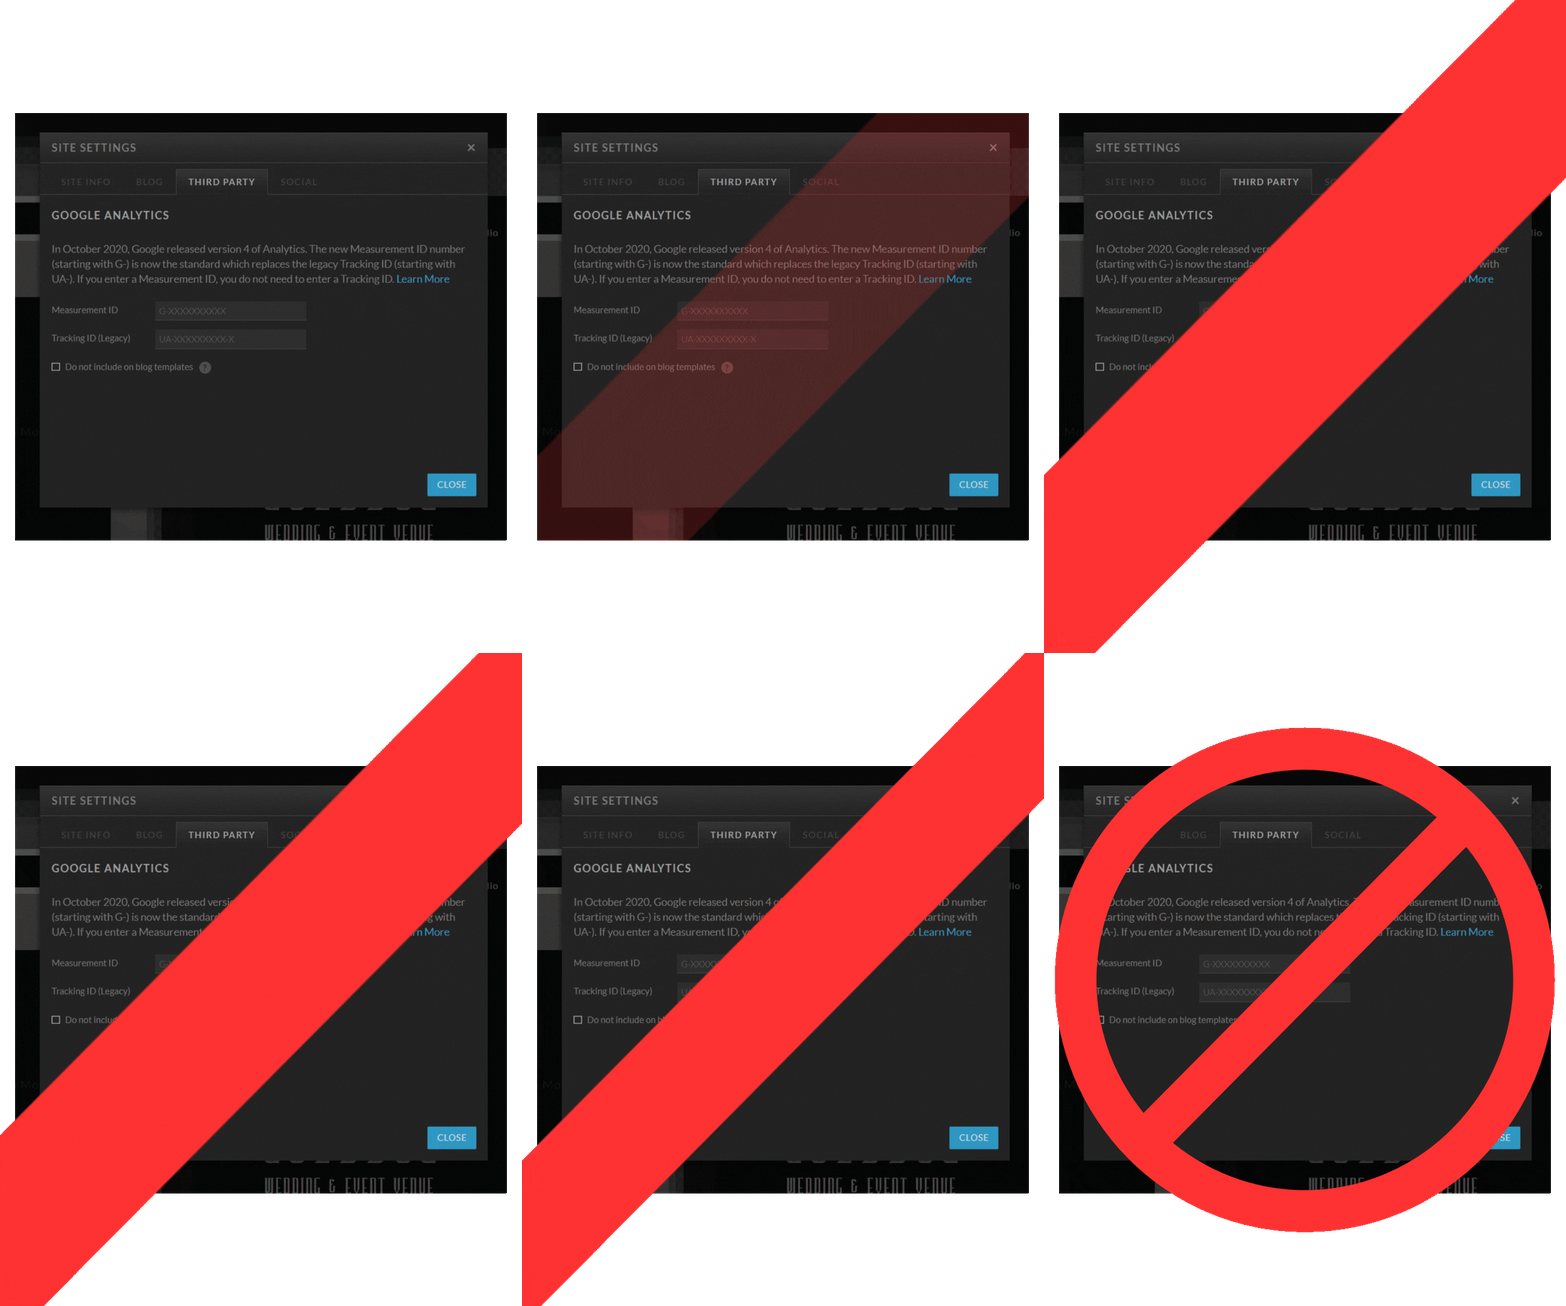
To connect GA4 to your Showit site, you MUST connect GA4 through the Termageddon And Usercentrics plugin, or a similar consent plugin installed on WordPress.
Showit run on WordPress; your page design is served via the app.showit.com drag-and-drop builder, while your page content and blog posts are served directly through WordPress.
Install the Termageddon + Usercentrics plugin on your WordPress all pages and blog posts carry the same tracking banner and apply the same modified GA4 snippet there. This is the only setup that records analytics data and respects user-consent.
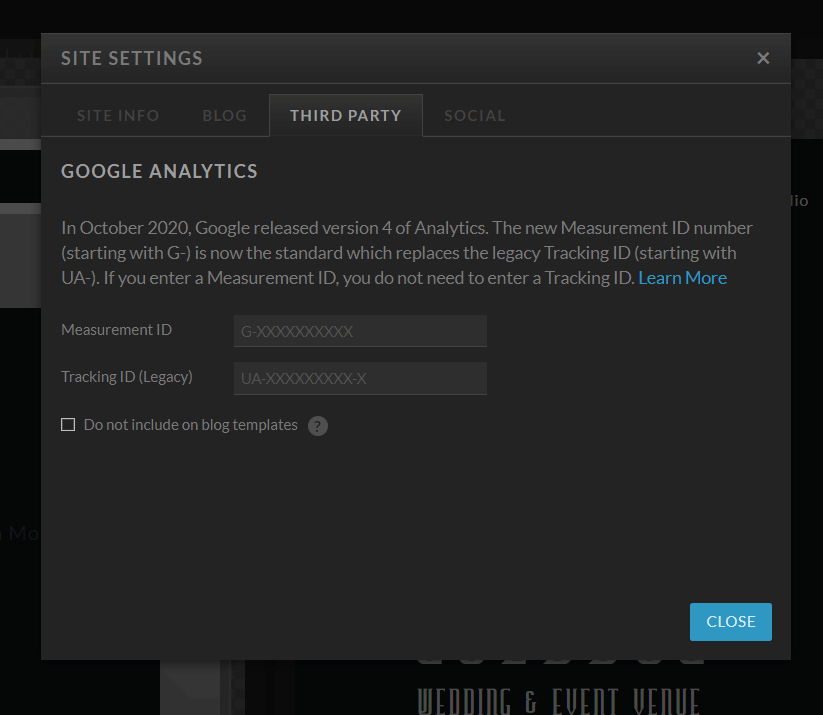
1. Leave Showit’s Google Analytics field empty. Anything placed in the Third-Party integrations field loads outside the consent banner’s control. If you previously pasted your measurement ID there, remove it, then re-publish your Showit design.
2. Install the Termageddon plugin. Your Termageddon dashboard provides the Usercentrics banner embed code as part of your privacy policies that stay automatically updated! So once you’ve done the easy-privacy checklist via TermageddonTermageddon, it’s time to install the Termageddon: Cookie Consent & Privacy Compliance by termageddon – plugin and activate it.
3. Select ‘Google Analytics 4’ from the Service dropdown field. The value in data-usercentrics must match the service name listed in your Termageddon Cookie Policy questionnaire exactly. If your policy lists the service as Google Analytics 4, the attribute must read Google Analytics 4. A mismatch means the banner never releases the script, or releases it under the wrong category.
4. Add the Google Analytics (GA4) script to the Termageddon plugin. Add the GA4 snippet with both script tags to the Usercentrics control attributes; that code will look like the example below but replace ‘G-XXXXXXXXXX’ with your Google Tag ID.
The type=”text/plain” attribute stops the browser from executing the script on load. The data-usercentrics=”Google Analytics” attribute hands control to the banner, which activates the script only after the visitor consents.
Remember to replace G-XXXXXXXXXX with your measurement ID in both places.
For the full walkthrough, read How To Set Up Google Analytics 4 On Your Showit Site.
Verify GA4 Is Tracking Correctly
Verification has two halves: confirm nothing fires before consent, and confirm tracking works after it.
First, the before state. Open your site in a private browser window. Before answering the banner, open your browser’s developer tools, go to the cookies panel, and confirm no _ga cookies exist. If they appear before you consent, a script somewhere still loads GA4 unconditionally. Check Showit’s Third-Party field and your head code.
Then, the after state. Accept the banner. Reload the page. The _ga cookies should now appear. In GA4, open the Realtime report from the Home screen. Your visit should register in Active users within seconds. Incorrect GA4 configuration leads to missing or inaccurate data. Verify before you rely on the reports.
Check Your Showit Sitemaps
A sitemap is an XML file that lists every page on your website. It tells Google which pages exist and which ones to crawl. Without a sitemap, Google discovers your pages through links alone, which means some pages may never be indexed.
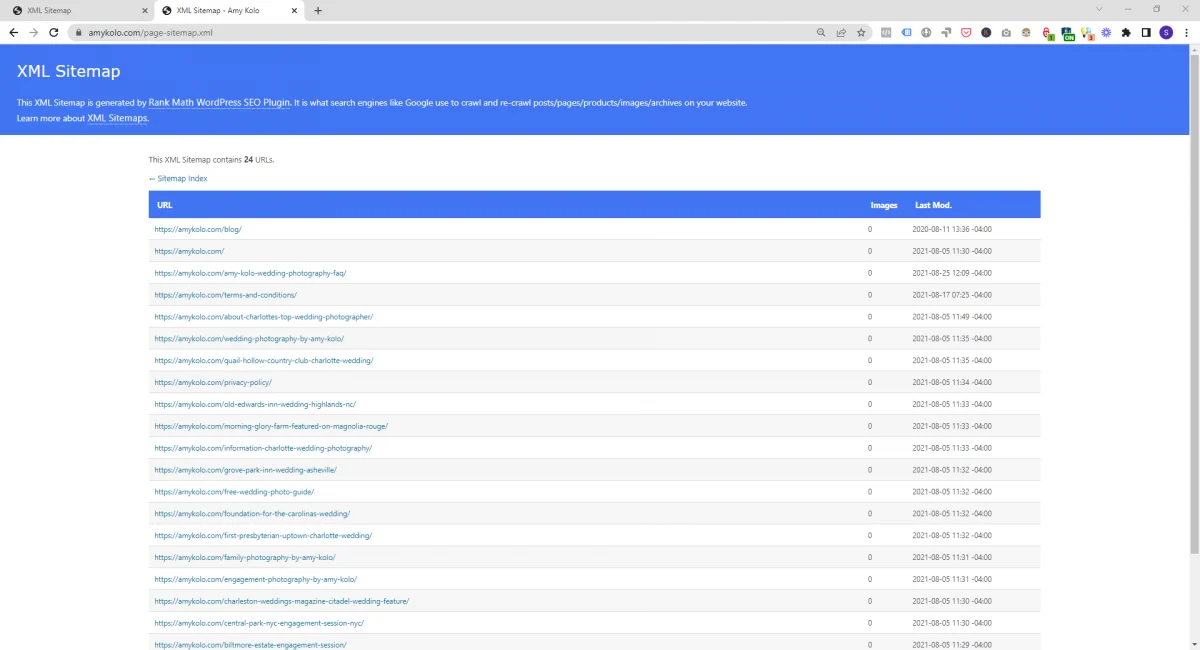
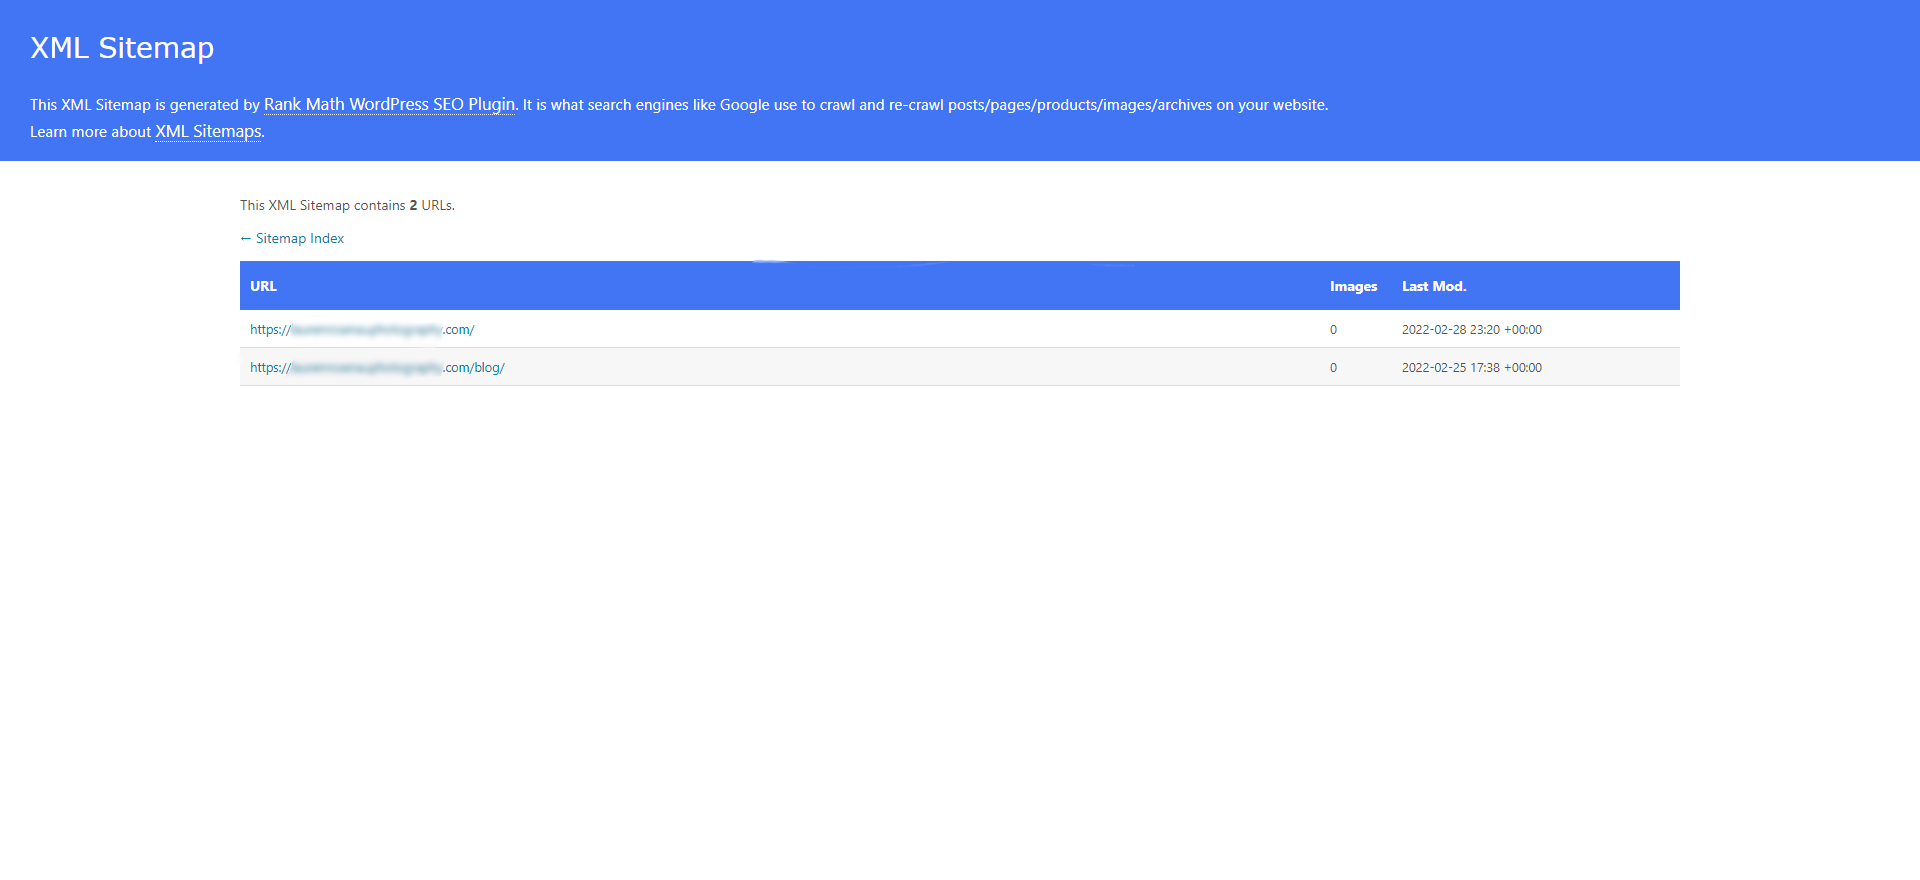
How to Find Your Showit Sitemap
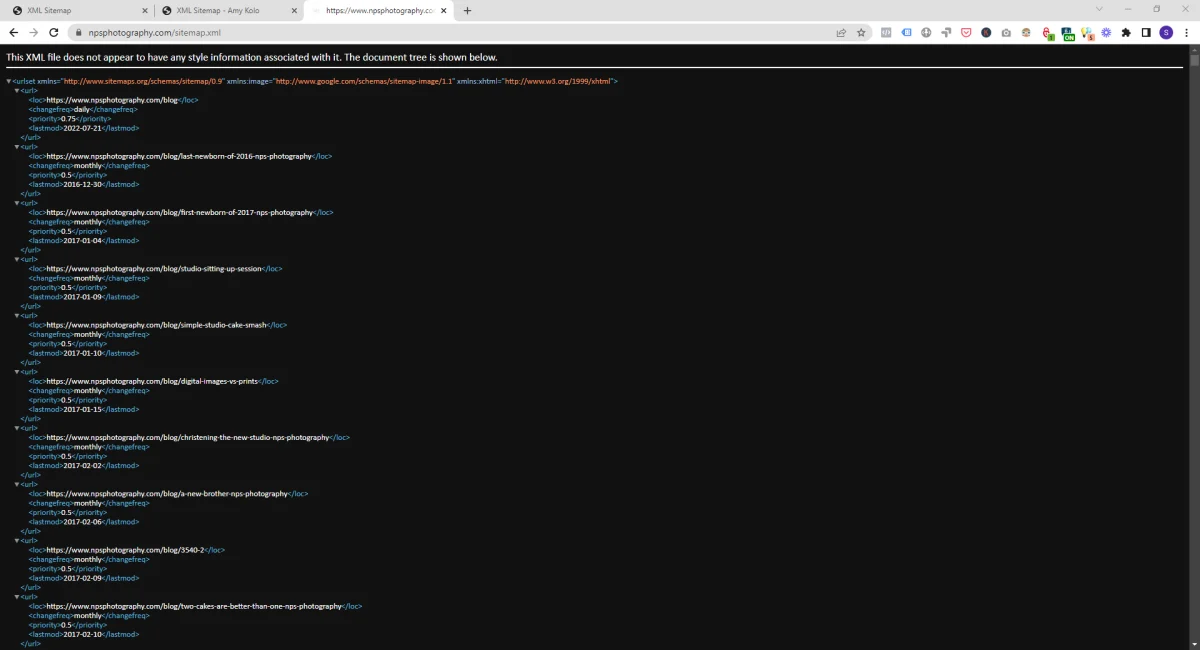
Sitemaps on Showit sites are typically located at one of these URLs: yourdomain.com/sitemap_index.xml, yourdomain.com/wp-sitemap.xml, or yourdomain.com/sitemap.xml.
When using RankMath on a Showit site with WordPress, the plugin generates separate sitemaps for pages, posts, categories, and other content types.
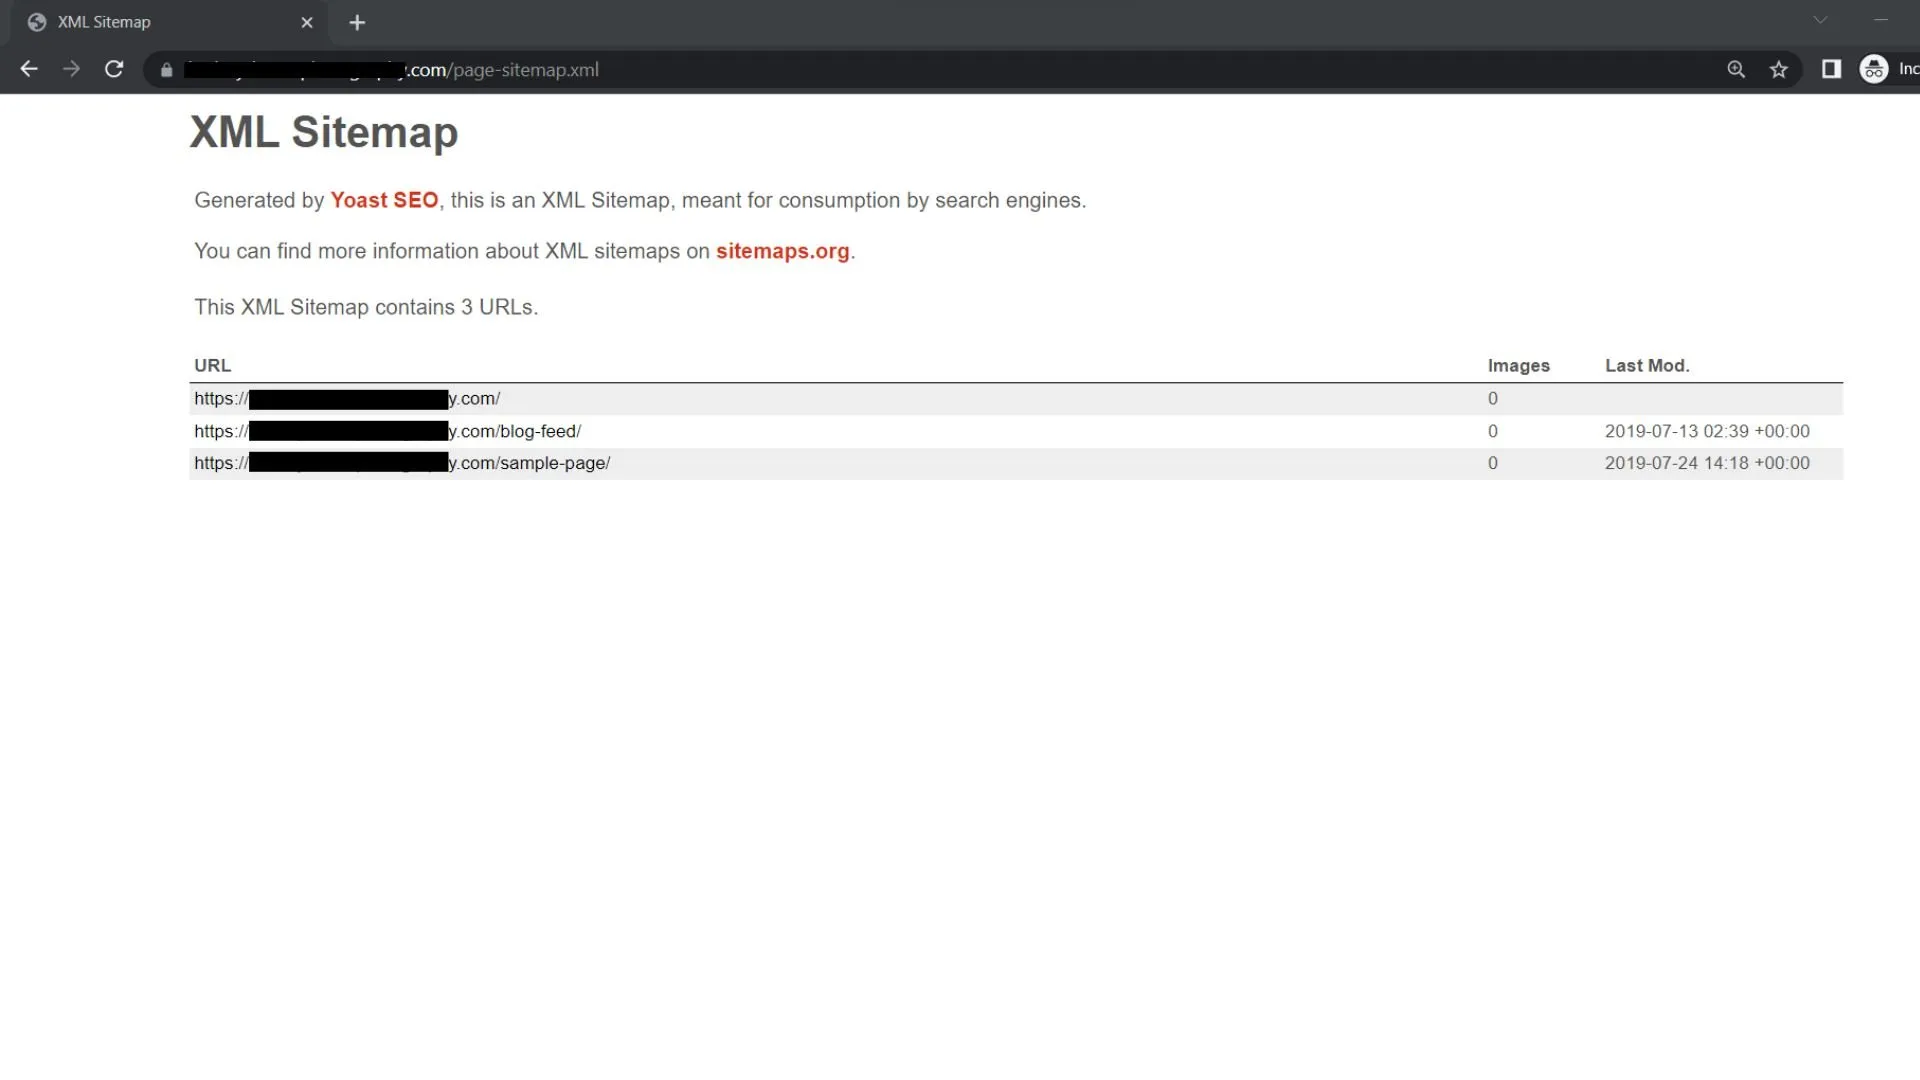
Review Your Sitemap Before Submitting to Google
Check your sitemap for dead pages before submitting it to Google Search Console. The two most common dead pages on WordPress sites are auto-generated during installation: the sample page and the hello world blog post. Remove these from your sitemap. Submitting dead pages tells Google your site contains broken content, which can affect how Google evaluates the overall quality of your site.
Submit Your Sitemap to Google Search Console
Check If Your Sitemap Has Already Been Submitted
- Log in to Google Search Console at search.google.com/search-console.
- In the left sidebar, under Index, select Sitemaps.
- Review the list to see if any sitemaps are already submitted.
How to Submit a New Sitemap
If no sitemap is listed, submit one:
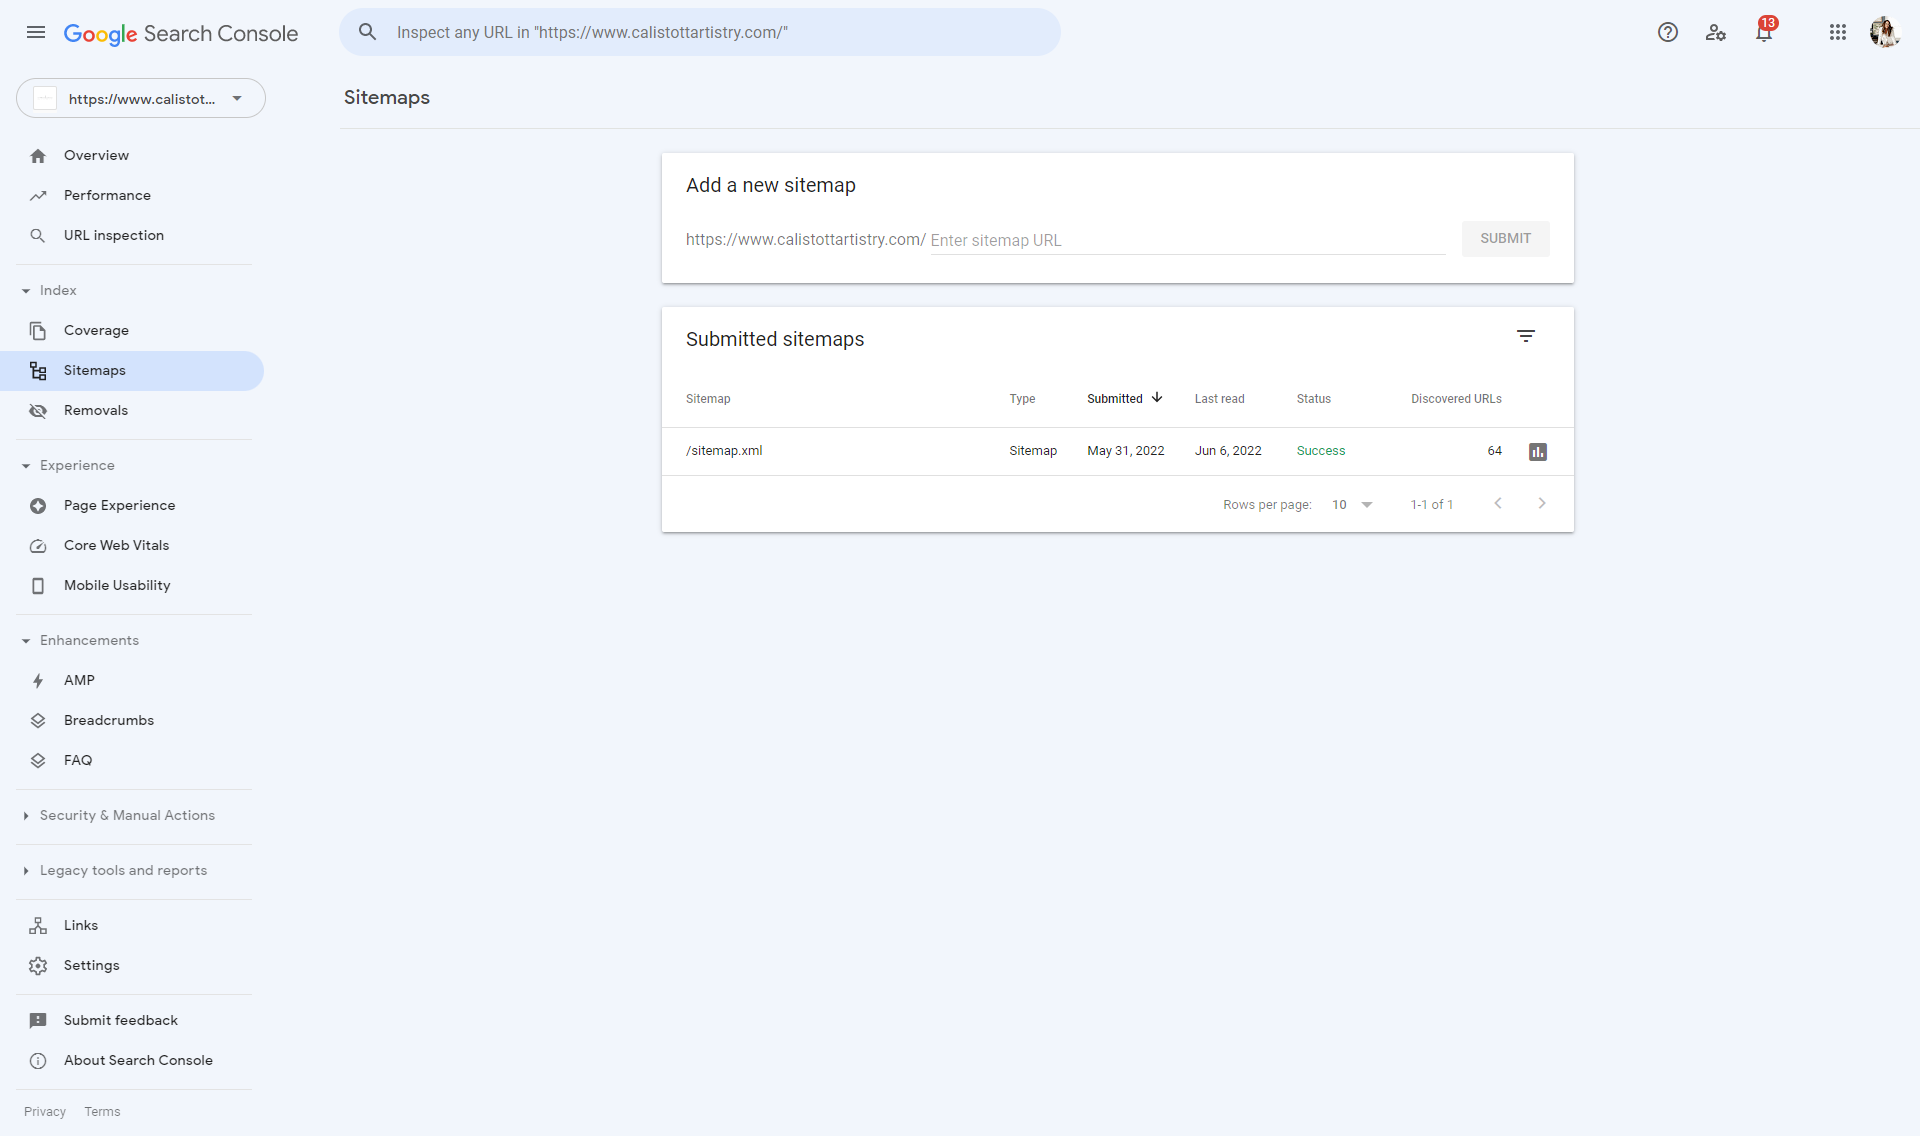
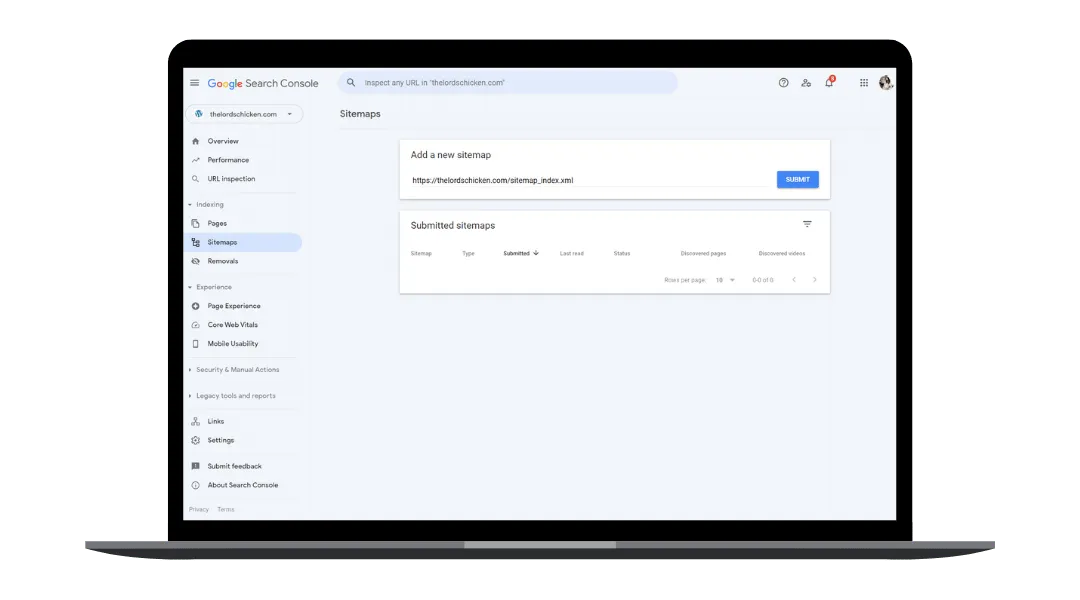
- Copy your sitemap URL (for example, yourdomain.com/sitemap_index.xml).
- Paste it into the field labeled “Add a new sitemap.”
- Click Submit.
Submitting your sitemap tells Google exactly which pages to crawl and index. Without it, Google relies on discovering pages through internal and external links, which can take weeks or months for new pages.
After submitting, Google Search Console reports whether the sitemap was processed successfully and how many pages it contains. Check back within a few days to confirm your pages are being indexed.
Frequently Asked Questions About Showit Website Migration
How Long Does a Showit Website Migration Take?
A Showit website migration typically takes between one and four weeks, depending on the size of the site and the complexity of the URL structure. A five-page portfolio site can be migrated in a few days. A site with hundreds of blog posts, multiple URL changes, and complex redirect maps requires more time for planning and verification.
Will I Lose My Google Rankings During a Showit Migration?
A properly executed Showit migration preserves your Google rankings. The steps in this guide, including maintaining URLs, setting up 301 redirects, and keeping page titles and meta descriptions intact, are designed to prevent ranking loss. A temporary fluctuation of a few positions is normal in the first two to four weeks after migration while Google re-crawls and re-indexes your site.
Do I Need an SEO Specialist for a Showit Migration?
You can complete a Showit migration on your own using this guide and the free checklist. However, sites with complex URL structures, large blog archives, or established search rankings benefit from working with a Showit SEO specialist who can plan the redirect strategy and verify that no pages are lost during the transition.
What Is the Difference Between Showit Pages and WordPress Blog Posts?
Showit uses its own page builder for static pages (Home, About, Services, Contact) and connects to WordPress for the blog. During a migration, these two systems require separate attention. Showit pages are managed in the Showit editor. Blog posts are managed in WordPress. Internal links between the two systems need to be verified individually after migration.
What to Do After Your Showit Migration
Once your site is live on Showit and you have completed every step in this checklist, monitor your Google Search Console and GA4 data for the next 30 days. Look for pages that dropped in rankings, 404 errors in the Coverage report, and any pages that Google has not yet re-indexed.
If you find issues, address them immediately. A redirect that was missed or a page title that changed inadvertently can usually be corrected with minimal impact if you catch it within the first week.
Next Steps
If you are planning a Showit migration, here are three ways to move forward:
- Download the free Showit Site Migration Checklist to work through the process on your own with a step-by-step guide and worksheet.
- Contact Morris & Co, known as MoCo.Marketing, to request a free SEO audit to assess how your current site is performing before you migrate.
- Work with a Showit SEO specialist at Morris & Co, known as MoCo.Marketing, to plan and execute your migration with full redirect mapping, technical verification, and post-launch monitoring.
Reach out to Morris & Co at support@moco.marketing to discuss your Showit migration, or leave a comment below with your questions.